Showing posts with label Christmas Card. Show all posts
Sunday, November 24, 2013
Christmas Card set
Hello everyone....I have a quick post for you this morning....I have two Grands staying with me this week and I got up early to get dibs on the computer!!! Once Cole and Autumn get up old grandma goes to the back of the line...LOL!!!! We don't have to pick mom up for church until 10:45 so we have time for a good breakfast....they ordered biscuits and gravy with scrambled eggs for Sunday breakfast!! I decided not to count carbs while they are here!!! Anyway....
I wanted to share a card set with you that I made for the church craft sale....I used a new stamp set that I bought from the Uniko Studio. You really need to check out their store..I just love all their stamps!!!
The doves, sentiment, and the leaf stamps are from the Peace on Earth set...the doves were stamped with Memento London Fog onto white card stock, cutout, dusted with glitter, and popped up with foam tape. The leaves were stamped with Fresh Snow ink (PTI), and the pearls and ribbon finish it off.
Thanks for stopping by on the cold sunday morning...I hope you have a wonderful and warm day!!
Supply List:
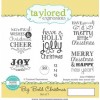
Stamps: Uniko Studio Peace on Earth
Paper: White, Real Red, Best Creations Christmas patterned paper
Ink: Memento London Fog, Fresh Snow
Accessories: Pearls, Ribbon, Glitter, Sewing Machine
Thursday, November 21, 2013
Joy to the World
Hello everyone....hope you are having a great day!!! I did my Thanksgiving grocery shopping yesterday....next week will be too crazy since I will have two of my Grands visiting. I also bought lots of their favorite things to eat...the kitchen will be rockin from morning till night...LOL!!!! Anyway...
I wanted to share a card I made for Monday's TLC challenge on Splitcoast. Dawn was the hostess and her challenge was to create a wreath with anything but a diecut. I used a retired Stampin Up! flower punch to create my wreath...the red rhinestones were added and a sentiment from a Taylored Expressions stamp set called Big Bold Christmas was stamped in the center with not quite navy ink.
The background paper is from Bo Bunny's Snowfall collection....sewing and distressing was done around the edges and the felt bow was made with the Taylored Expressions Mix and Match Bow Dies.
Thanks for stopping by....have a great day!!!!
Supply Lisy:
TE Stamps: Big Bold Christmas
Paper: Choice Snow White (TE), Not Quite Navy (SU), Bo Bunny Snowfall Collection
Ink: Not Quite Navy (SU)
Accessories: Red Rhinestones (Kaisercraft), Flower Punch (SU), Sewing Machine, Red Hot Felt (TE)
TE Dies: Mix & Match Bows
Saturday, December 3, 2011
Pease and Joy
Good morning everyone!! Hope you are all well and happy on this wonderful Saturday morning!! I am going to a church breakfast in a couple of hours....don't know if I can hold off eating till then. I might have to nibble a little cause my stomach is growling already!! It's not used to being abused in the morning...LOL!! Hopefully, I can get my Christmas tree decorated this afternoon and then start wrapping gifts....I can't believe I am ahead of the game this year...Whoohoo!!! Last year I was still buying gifts and wrapping on Christmas Eve....yikes! Anyway... I made this card a couple of days ago...the adorable little Penny Black bird image was colored with copics and mounted on two different mediallion diecuts. The paper is from October Afternoon and Stampin Up!. The sentiment is from Flourishes Christmas Classics set and the Spellbinders diecut snowflake and button with twine finish it off. ...pretty simple but fun to make!!
I made this Christmas card for a few challenges:
1. Bling it On - Christmas
2. Forever Friends Challenge - It's all Christmas
3. Fairy Tale Challenge Blog - Christmas
4. Pattie's Creations Design Challenge - Christmas
5. Raise the Bar - Christmas
Thanks for visiting...have a great Saturday!!
Tuesday, November 29, 2011
A New Toy!
Good morning everyone...I have to work today so this will be short and sweet! I got a new Tim Holtz Alterations Sizzix holly leaf die and just had to play with it!! The leaves and berries were stamped with Rubbernecker's Screen Background #452 and sponged with Handsome Hunter and Ruby Red. I used some Walnut Crystals on the branch but after I mixed up the crystals and water, I promptly spilled the stain all over my work surface and flooded the branch....oy vey!!! I kinda ran out of steam after that!!! The RN Merry Christmas sentiment #387-10 was stamped with Handsome Hunter and the seam binding, button, and gold cording finish it off.
Recipe:
Stamps: Rubbernecker Screen background and Rubbernecker sentiment
Paper: White, Handsome Hunter, Chocolate Chip, Ruby Red, Basic Grey dp
Ink: Handsome Hunter, Ruby Red
Accessories: Walnut Crystals, TH die, Button, Gold Cording, Seam Binding,
Thanks for dropping by...have a super fab day!!!
Monday, November 21, 2011
TLC352 - Let's Make Some Snow!!
Hello everyone!! It's my turn to host the TLC challenge on Splitcoast...since Holly and I are continuing our focus on the holidays until December 19th, how about setting the scene for some holiday fun!! Let's make a little snow....you can:
1. Use Flower Soft
2. Rub two pieces of styrofoam together to create home made snow
3. Tear and crimp white cardstock
4. Tear white cardstock and add Stickles to the torn part
5. Use patterned paper
6. Use a snow stamp
7. Use a winter snow scene stamp
8. Use snowflakes
9. Use Stickles or glitter to create falling snow
10. Make a card, gift box, ornament, gift set...what ever your little heart desires!!!
My card features the cute Rubbernecker G.Q. Polar Bear . He was colored with Copics, cutout and popped up in the snow which was made with torn white cardstock and the edges were covered with Stickles. The background was created first by sponging the clouds using Pool Party and a homemade cloud template. Then the three tree stamps from Stamp Oasis' Evergreen Set from Rubbernecker were stamped using Handsome Hunter, Always Artichoke, and Old Olive. The sign and cardinal from RN's Christmas Outdoor Set were also colored with Copics, cutout, and popped up with foam dots. The edges of the background layers were distressed for the finishing touch.
This was also for the 2 sisters Challenge to add sparkle, Crimbo Crackers Challenge to make it sparkle, and the Moving Along With the Times Challenge to let it snow.
Thanks for visiting and be sure to join us for the Technique Lover's Challenge on Splitcoast...I would love to see your snow creations!!!
Sunday, November 20, 2011
Rubbernecker Challenge #1 - Sisterhood Sunday
Good morning everyone!! Are you ready for some FABULOUS inspiration and a super fun challenge??? The Rubbernecker Stampin Sisterhood's first challenge is today and what a gorgeous inspiration photo!!! Mr. Rubbernecker is also giving away a prize....check it all out on the Rubbernecker Blog!!
I found my inspiration in the colors and the tree theme...I guess poinsettias go along with trees and Christmas, too!! The paper and the bingo card are all from Simple Stories 25 Days of Christmas dp...the poinsettia and leaves were made from Spellbinder's dies. The Rubbernecker Trees with Snow set #52-0206 were stamped with Always Artichoke three times on the dp, watercolored with Old Olive, cutout and the layers were popped up with foam dots. The stars and trunks were colored with copics. Seam binding, gold cording, and a gold button finish it off.
This is also for a few other challenges:
1. Wags 'n Whiskers Challenge - Christmas
2. Winter Wonderland Challenge - Christmas...use any cute image (my trees)
3. C.R.A.F.T Challenge - Stars in your eyes (stars on the trees)
4. CCEE Challenge - use 2 punches or diecuts (the poinsettia and leaves)
Thanks for stopping by...have a great day and be sure to check out the Sisterhood Sunday challenge!!!
Friday, November 18, 2011
Christmas is in the Air!!
Good morning everyone and happy Friday!! We have been busy the last couple of days cleaning this dirty house...we pick my Sister and her DH up at the airport tomorrow. They well stay until Tuesday... hopfully we will have some warm weather for them. It just blows me away at how much junk I can collect in just a few months!! If I don't shred junk mail every day, I end up with a stack...why are they sending me all that stuff when I just get rid of it....it's a wonder we have any trees left at all!!!
Anyway...enough whining!! On to a much better subject...Christmas!! I made this bag for the
TLC Challenge on Splitcoast. Holly's challenge was * it's a wrap* so I decorated a gift bag. The vintage Santa from Crafty Secrets was stamped with Real Red and it was layered onto a fancy Spellbinder's doily diecut. The papers and stickers were all from The Girls Paperie Tinsel and Twig collection.
I made this card yesterday for the Ways to Use It Challenge on Splitcoast....it was called *Baby it's cold outside*. What a fun challenge...it gave me a chance to use the cute little bird, sentiment, and snowflakes from Paper Smooches new winter set called Swanky Snowdudes. The birds were colored with copics and Stickles was added to the fur on the birds caps. The branch stamp from Impress was stamped with Memento Rich Cocoa and the snow with Stickles, SEI paper, and ribbon finish it off.
Thanks for stopping by on this beautiful Friday morning...I hope you day is super special!!!
Monday, November 14, 2011
Chubby Snowmen
You will find the Rubbernecker Holiday Blog Hop here...remember, you will have till November 17 to complete the hop!!
Good Monday morning everyone...I am sooo going to get some things done today!!! I have some gardening to do, clothes to wash, floors to mop, and food to cook but first I gotta play...LOL!!! Maybe if I'm really good my Fairy Godmother will come and get the work done so I can play in the craft room....oh well, a girl can dream, can't she!!! Anyway....I did get to play last night ...aren't these chubby little snowmen just the cutest??!!?? I have had this set for a few months but never inked it up...shame on me!!! The sweet little snowmen are from Paper Smooche's Swanky Snowdudes set...they were cutout, colored with Copics, and attached with foam dots. The background paper is SEI's Glitzmas dp and snowflakes from the same set were stamped on the paper with Marina Mist. The snow was made by tearing the white cardstock, crimping it, and adding stickles to the torn edge. The sentiment banner and button with Baker's Twine finish it off.
I made this card for a few challenges:
1. Order of the Opus Gluei - something on their head
2. Totally Gorjuss - Christmas Traditions
3. Christmas Stampin All Year Long - Use a stamp that has never seen ink - My Paper Smooches set!
4. Floweret - Christmas
5. Wags 'n Whiskers - Christmas
Thanks for stopping by...have a wonderful Monday!!!
Sunday, November 13, 2011
Rubbernecker Stamps Holiday Blog Hop
Hello everyone...welcome to the Rubbernecker Holiday Blog Hop!!The Stampin’ Sisterhood has LOTS to share today!! Thank you SO much for joining us! We all thought it would be a GREAT idea to share some of our HOLIDAY images!! SO, sit back and ENJOY!!! If you leave a comment on EVERY stop along the way, you will be entered into a RANDOM drawing for your choice of ONE Rubbernecker Stamps SET!! Mr. Rubbernecker wants YOU to be able to choose, so you will LOVE what you get!! OK, we know that you are busy, so you will have until THURSDAY 11/17 to HOP! Our WINNER will be announced on the RUBBERNECKER BLOG, on FRIDAY 11/18!!
My card features the Christmas Deer #SKU-1508 SO....it was embossed with Gold Embossing Powder and then the holly and berries were colored with copics over the embossing. The image was masked and the Rubbernecker French Script background #448 was stamped over the the background area...a light green copic was used to shade and highlight around the image. Sewing and distressing was done around the patterned paper background and the gold pearls, silk ribbon, lace, and felt snowflakes finish it off.
Recipe:
Stamps: Christmas Deer, French Script Background
Paper: Vanilla, Always Artichoke, Certainly Celery, Basic Grey Jovial dp
Ink: Versamark, Memento Desert Sand
Accessories: Silk Ribbon, Gold Pearls, Gold EP, Copics, Felt Snowflakes, Sewing Machine, Lace, Snowflake Embossing Folder
**Hop Route**
Charlene Merrick
Frances Gumprecht
Holly McMillen
Jacquie Peifer
Jen Charboneau
Jennifer Cuthbertson
Joan Ervin ........you are here
Judy Rozema
Julia Aston
Karen Hunsaker
Kecia Waters
Kittie Caracciolo
Maria Gurnsey
Rubbernecker Stamps
We have some exciting news to share!! We will be starting some AWESOME Rubbernecker challenges on SUNDAY 11/20!! Hope you will join us for SISTERHOOD SUNDAYS!! We are going to have a BLAST!! Who knows? You could win a prize on SUNDAYS too!!!
Thanks again for stopping by, have fun and good luck!!
Friday, November 11, 2011
Felt Poinsettia
Good morning everyone....it's close to freezing this morning so I'm sitting here with a cup of cocoa and the fireplace is going strong....sooo warm and cozy!! It will warm up to 70 something this afternoon so I can get
some pansies planted. It's Veteran's Day and my red felt poinsettia isn't a poppy but it's close. I hope all the Vets have a great day including my husband, George, and my Dad. George is retired Army and my Dad served in the Navy during WWII at Pearl Harbor. Mom and I are going to take the boys out today for dinner and a movie....just a little thank you for their service!! Anyway....
I made this card yesterday for the Ways to Use it Challenge on Splitcoast to make something dimensional for the white space on our card. Spellbinders dies were used for the felt poinsettia and leaves...the paper and ribbon are Stampin Up! and the sentiment is from Rubbernecker. The gold balls in the flower center finish it off.
This is also for a few other challenges:
1. Dutch Dare Card Challenge - punches/dies/nesties
2. Sweet Stamps - red/green/gold
3. Make My Monday - Christmas
4. Stamping Scrapping Challenge Central - Christmas/Holiday
5. I Did It Creations Challenge - Christmas
Thanks for visiting....stay warm and thank a Veteran today!!!

Friday, November 4, 2011
Church Craft Fair Christmas Card Sets
Good morning everyone...I guess it's morning...it's almost 1:00 AM and I'm still up trying to finish my Christmas card sets for the church craft fair this Saturday...yikes, it's tomorrow!!! What a crazy week....my cousin and his wife are here visiting from Iowa, my DGD's birthday was yesterday, and I am knee deep in Christmas cards...LOL!!! Oh well, I can sleep Saturday night!
This card features stamps from Papertrey Ink...the ornament was cutout, colored with copics, covered with glitter, and popped up with pop dots.
The Rubbernecker tree image was embossed with white ep and the bird was popped up with a pop dot. The sentiment is also from Rubbernecker.
I had some left over stickers from another project and just couldn't let them go to waste...
The stamp in the background is from Stampin Up's Beautiful Season set..it was stamped with True Thyme onto River Rock cardstock. Real Red cardstock is used for the matting and the button and twine finish it off.
The background was embossed and an oval scalloped Nestabilities was used to matt the sticker.
Group #3.....
An old but favorite PBX stamp was used for this vintage style Christmas card and the sentiment is from PTI....flocked paper adds a little glam and the silver pearls finish it off.
Last but not least is a Penny Black Santa stamped with Night of Navy onto Bashful Blue...glitter was added to the beard and fur and the punched showflakes and silver balls are the finishing touches.
Now, I just have to wrap each set with a ribbon and get them to the sale along with the other cards I made from my friend Sue's pictures. I will show you more of those this weekend. Ok...now it's time for this old grandma to get to bed...have a great day!!!
This card features stamps from Papertrey Ink...the ornament was cutout, colored with copics, covered with glitter, and popped up with pop dots.
The Rubbernecker tree image was embossed with white ep and the bird was popped up with a pop dot. The sentiment is also from Rubbernecker.
The ornament stamps are from a Basic Grey set called Ornaments and the sentiment is from Waltzingmouse Stamp's Complements of the Season set. Colors used include Pool Party, Kiwi Kiss, and Cherry Cobler.
I had some left over stickers from another project and just couldn't let them go to waste...
The stamp in the background is from Stampin Up's Beautiful Season set..it was stamped with True Thyme onto River Rock cardstock. Real Red cardstock is used for the matting and the button and twine finish it off.
The background was embossed and an oval scalloped Nestabilities was used to matt the sticker.
Group #3.....
An old but favorite PBX stamp was used for this vintage style Christmas card and the sentiment is from PTI....flocked paper adds a little glam and the silver pearls finish it off.
I used an old retired plaid background stamp from Stampin Up! to make the background and the pine cone
stamp is from Penny Black. Handsome Hunter and Vivid's Tuscan Tan inks were used and the gingham ribbon and cotton lace add a country flair.
Now, I just have to wrap each set with a ribbon and get them to the sale along with the other cards I made from my friend Sue's pictures. I will show you more of those this weekend. Ok...now it's time for this old grandma to get to bed...have a great day!!!
Wednesday, November 2, 2011
Color Throwdown Challenge #166
Hello everyone!!! It's Wednesday and time for another Color Throwdown Challenge!! The lovely Danielle is our hostess today and she came up with this fabulous color combo... isn't it pretty!!??!!
My card features the beautiful Christmas Angel stamp from Inkadinkado...it was stamped with Baja Breeze and the snowflakes were covered with glitter. The paper is from Basic Grey's Dasher collection and sewing and distressing were done around the edges. The diecut scallop, ribbon, twine, button, punched snowflakes, and Christmas stick pins finish it off.
Recipe:
Stamps: Inkadinkado, Our Craft Lounge for the sentiment
Paper: White, Crumb Cake, Old Olive, Basic Grey dp
Ink: Baja Breeze, Memento Tuxedo Black
Accessories: Ribbon, Twine, Button, Pearl, Martha Stewart Snowflake Punches
Stick Pins, Sewing Machine, Nestabilities, Spellbinders Scallop Edges die, Glitter
This is also for a few other challenges:
1. Anything Goes Challenge - stitching real or faux
2. Ladybugs Crafts Ink TLT Challenge - Non-traditional or distressed Christmas Card
3. Oldie but a Goodie Challenge - buttons and bows (my stamp is over 2 years old!)
4. By the Cute and Girly Challenge - Christmas Girls
5.Creatalicious Challenge - distress edges
6. Really Reasonable Ribbon - Christmas
Do you want to see some AWESOME inspiration?? Here are the links to the Color Throwdown Designers..... check out what they created this week!
Broni Holcombe - Splashes of Watercolor
Barbara Anders - Paper Pursuits
Danielle Kennedy - Wild Dragonfly Designs
Tammy Hershberger - Stamp Happy
Kristin Eberline - Mindless Creativity
Laura Pryor - Lil' Inker Designs
Carole Burrage - Mother's Little Helper
Keva Brown - How Now Brown Kow
Lori Tecler - Inking a Loud
Lynn Put - The Queens Scene
Wanda Cullen - Cullen-ary Creations
Kerri Michaud - Cards by Kerri Welcome!!!!
Joan Ervin - Stamping With a Passion - that's me!
Our Fabulous November/December Guest Designer - Lydia Fiedler - Understandblue
Thanks for stopping by...have a great day!!!
Sunday, September 4, 2011
Christmas Joy
Good morning!!! I am still at The Trading Days in Canton, Texas but I did schedule this to post today....I am still making flat Christmas cards for easy mailing and I wanted to share this with you...I used one of my favorite Taylored Expressions sets called Wings of Joy!! The image was paper pieced with the same October Afternoon Good Cheer dp that was also used in the background. The bird, holly, and bow were all stamped on scrap white, colored with Copics, cutout, and glued to the stamped image. The diecut doily, ribbon, and sewing finish it off.
Recipe: Stamps: Wings of Joy from Taylored Expressions/
Paper: Vanilla, Riding Hood red, October Afternoon's Good Cheer
Ink: Memento Tuxedo Black
Accessories: Nestabilities Ovals, Ribbon, Papertrey Ink Doily Die, Sewing Machine, Copics
Thanks sooo much for stopping by....I will be back tomorrow for the Fall Hop...stay tuned!!!!
Sunday, August 28, 2011
TLC340 Embossed Kisses
Hello everyone...it's my turn to host the TLC challenge on Splitcoast and this weeks challenge has come to us from the very talented Susan Roberts...it's called Embossed Kisses!!! She created a tutorial for this technique on her blog...check it out!!
My card features ornament stamps from Papertrey Ink's Vintage Ornaments. Each ornament was "kissed" just a little bit differently. The red one was inked up with Riding Hood Red and kissed on a dry diamond shaped embossing folder before stamping it on the white cardstock. The light green one was inked with River Rock and kissed on a snowflake folder that was inked up with Old Olive. The small round ornament was inked with Old Olive and kissed on a swirly folder that was inked with black. The ornaments were all cutout and adhered to the doily with pop dots. The doily was cutout using a Papertrey Ink doily die, the scallop was made with a Papertrey Ink scallop die, sewing was done around the edges of the background paper, and the seam binding, felt snowflake, button, and Baker's Twine finish it off.
Recipe: Stamps: Papertrey Ink Vintage Ornaments
Paper: Authentique's Wonder dp, Vanilla, Riding Hood Red
Ink: River Rock, Riding Hood Red, Old Olive, Black
Accessories: Gold Cording, Seam Binding, Felt Snowflake from Little Yellow Bicycle, Button, Baker's Twine, Doily Die from PTI, Scallop Die from PTI, Sewing Machine, Embossing Folders
Thanks for stopping by....come join us for the Technique Lover's Challenge on Splitcoast!! I would love to see what you create!!!!
Subscribe to:
Posts (Atom)